Want to track UTMs and more on your Contact Form 7 plugin in WordPress? You are at the right place… If not, please check Handl UTM Grabber Integrations page for other plugin (e.g. Gravity Form, Ninja Form and more) integrations.
Why/How should I use HandL UTM Grabber / Tracker with Contact Form 7
Contact Form 7 is one of the most downloaded plugin on WordPress if not the most. Many WordPress users prefer CF7 because it is very easy to use and compatible with various of plugins and themes.
As a business/website owner, it’s always good idea to know more about your clients to better strategize your marketing goals. That’s where UTM code comes handy.
UTM is a simple code that you can attach to your URLs in order to track a source, medium, campaign and more. This enables Google Analytics to inform you how your visitors find your website and what your prospect is interested in. Of course, Google Analytics only provides this information at very generic (e.g. per URL, data range etc.) level.
As a business owner, your goal is knowing more about your CLIENTS rather than other metrics. That’s why combining UTM codes with user data is very crucial in marketing. And this is exactly how HandL UTM Grabber helps you to accomplish.
OK… That’s enough chit chat, let me know talk about how you can integrate HandL UTM Grabber with Contact Form 7 and attach those UTM data (and more) with your clients (prospects) and eventually pass it to your favorite CRM (Customer relationship management).
What you need to get started?
First of all, in order to get started, you need couple things:
- Contact Form 7 (of course ?)
- HandL UTM Grabber
If you are not familiar with HandL UTM Grabber, or want to learn more about what you can capture, please visit this page.
So… you downloaded both Contact Form 7 and HandL UTM Grabber plugin? OK, Let’s move on then…
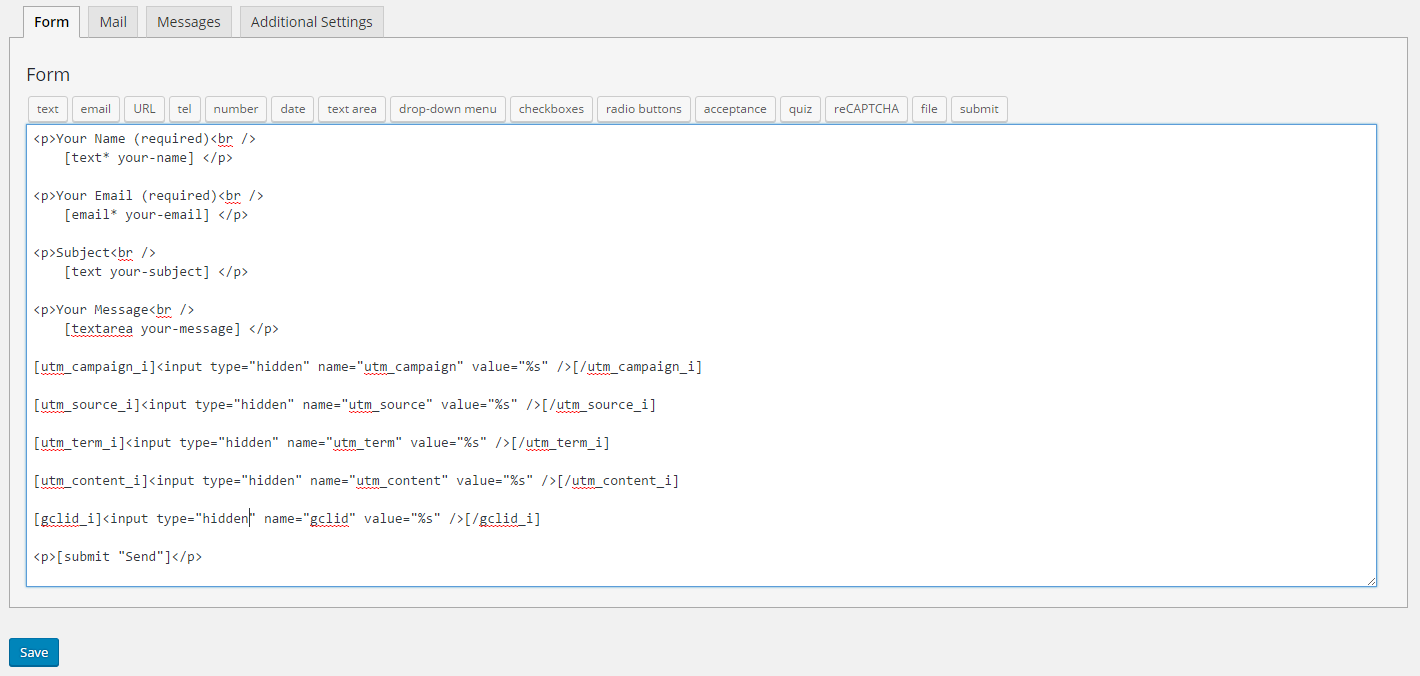
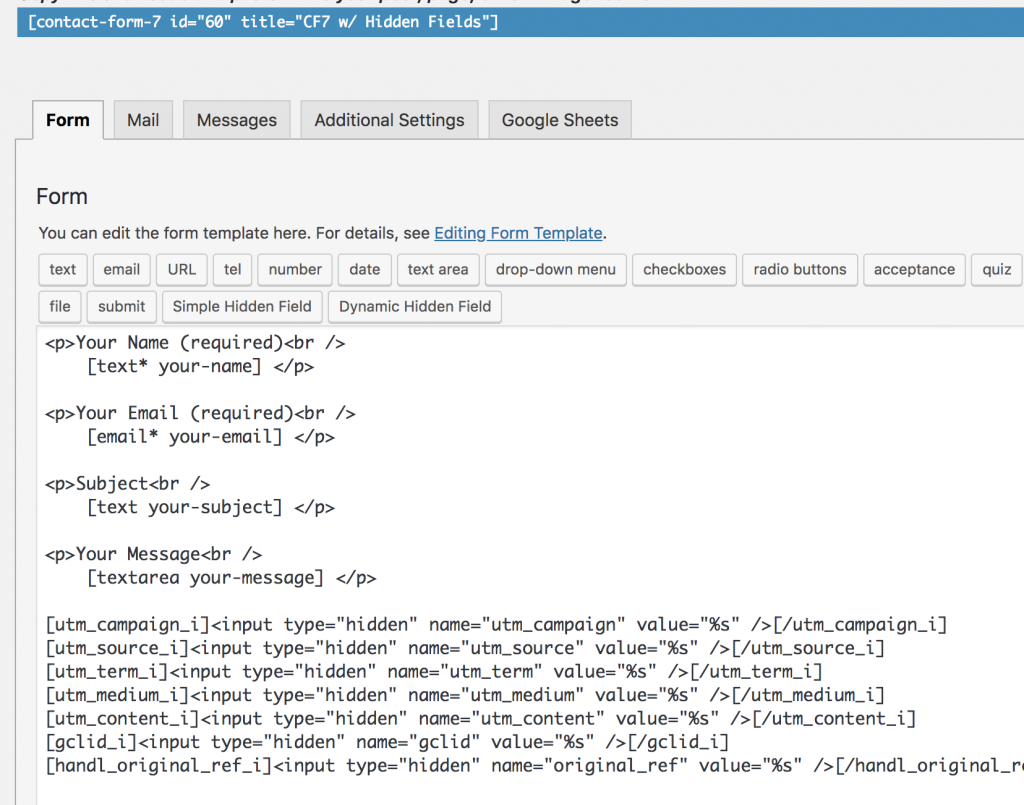
First we are adding the shortcodes in the form as it is shown below.
Example Code Snippets
[[utm_campaign_i]]<input type="hidden" name="utm_campaign" value="%s" />[[/utm_campaign_i]] [[utm_source_i]]<input type="hidden" name="utm_source" value="%s" />[[/utm_source_i]] [[utm_medium_i]]<input type="hidden" name="utm_medium" value="%s" />[[/utm_medium_i]] [[[[utm_term_i]]<input type="hidden" name="utm_term" value="%s" />[[/utm_term_i]]]] [[utm_content_i]]<input type="hidden" name="utm_content" value="%s" />[[/utm_content_i]] [[gclid_i]]<input type="hidden" name="gclid" value="%s" />[[/gclid_i]]Here is what it looks like:
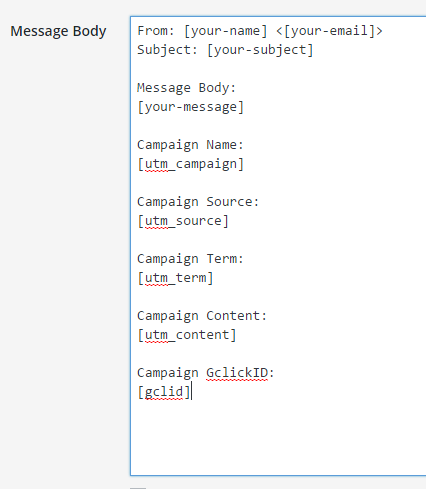
And then, to include the new inputs in the email
Campaign Name: [[utm_campaign]] Campaign Source: [[utm_source]] Campaign Medium: [[utm_medium]] Campaign Term: [[utm_term]] Campaign Content: [[utm_content]] Gclid: [[gclid]]Here is what it looks like:
Done!
Are you with me so far? If you followed the directions correctly, you should be ready to roll.
If not, I’ve a video version of this tutorial (you are lucky!). Check it out here:
Feel free to drop me a line in the comment section below if you have question about Contact Form 7 and HandL UTM Grabber. I am usually prompt answering, jut try ?