
Installing Free Letsencrypt SSL for multiple domains and sub-domains on Amazon Web Services’ (AWS) EC2 – Very Simple Way…
We are entering a new era of “secure internet”. Are you ready for the change? Well, you had better be, many big corps (including PayPal, Google and lastly the WordPress) have announced that they will require hosts to have SSL (or HTTPS) available for certain services, APIs, webhooks and OAuth.
Getting an SSL certificate for your host has been a lot cheaper recently along with many 100% free options. Free SSL provider list has been growing enormously everyday, Googling “free ssl” will get you hundreds-thousands websites. In this article, I will show how you can install -one of the free SSL providers- Letsencrypt on your server. I have recently done it for my websites so everything here on is a first-hand experience and works 100%. I use AWS’s EC2 instance (Red Hat 4.8.3-9 to be precise) but this is applicable to most of the unix server.
OK, let’s get started before I make it unnecessarily long.
First of all I assume, your site is perfectly loading via yourdomain.com and you are on a private network (that means you are the only owner of the IP you are using).
Optional side note: I use Amazon’s Route 53 to host my DNS zone files. It is really easy to use, reliable, fast and it has a nice GUI to get you started in a minute. I highly recommend it if you are looking for a place to host your DNS. If you are having them on your domain provider (e.g. Godaddy), that’s absolutely fine as well. Route 53 is not FREE though. They charge $0.50 per month per site up to 20 sites.
Install the certbot client
Go to this website https://certbot.eff.org/ and simply select your operating system and the web-server client. Follow the steps to install certbot-auto. In my case, I used the following couple lines.
wget https://dl.eff.org/certbot-auto
chmod a+x certbot-auto
And the next you need a very simple config.ini file, I put mine under /etc/letsencrypt/config.ini, it includes following. Don’t forget to change “youremail@company.com” to your email address.
rsa-key-size = 4096
email = youremail@company.com
Our certificate client ready, this will allow us to install and update the certificate.
Create the SSL certificate
Go to the directory where you installed your certbot-auto client. And simply run the following commands. Don’t forget to change domain.com to your domain name (and of course the directory of the files)
certbot-auto certonly --webroot -w /var/www/html/domain1 -d domain1.com -d www.domain1.com -w /var/www/html/domain1/sub -d sub.domain1.com --config /etc/letsencrypt/config.ini --agree-tos --keep
certbot-auto certonly --webroot -w /var/www/html/domain2 -d domain2.com -d www.domain2.com -w /var/www/html/domain2/sub -d sub.domain2.com --config /etc/letsencrypt/config.ini --agree-tos --keep
You can run the code above for your other domains/subdomains similarly.
If everything goes smoothly (hopefully, it will). It will generate the certificate files under /etc/letsencrypt/live/domain1.com and /etc/letsencrypt/live/domain2.com we will use them in the next step.
Attach them to your domain
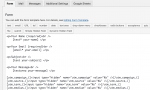
Now edit your ssl configuration file at /etc/httpd/conf.d/ssl.conf. And copy the below code for each domain/subdomain.
<VirtualHost *:443>
    ServerName www.domain1.com:443
    DocumentRoot "/var/www/html/domain1"
    SSLEngine on
    SSLCertificateFile /etc/letsencrypt/live/domain1.com/cert.pem
    SSLCertificateKeyFile /etc/letsencrypt/live/domain1.com/privkey.pem
    SSLCertificateChainFile /etc/letsencrypt/live/domain1.com/chain.pem
    SSLProtocol All -SSLv2 -SSLv3
    SSLHonorCipherOrder on
    SSLCipherSuite "EECDH+ECDSA+AESGCM EECDH+aRSA+AESGCM EECDH+ECDSA+SHA384 EECDH+ECDSA+SHA256 EECDH+aRSA+SHA384 EECDH+aRSA+SHA256 EECDH+aRSA+RC4 EECDH EDH+aRSA !RC4 !aNULL !eNULL !LOW !3DES !MD5 !EXP !PSK !SRP !DSS"
</VirtualHost>
Let’s automate it to renew after 90 days
SSLs generated by Let’s Encrypt is valid only for 90 days. You need to renew the certificate before it expires so there is no downtime through your HTTPS traffic. I use crontab for this using the code below.
0 0 1 * * /var/www/renewcert.sh
And my renewcert.sh looks like this…
#!/bin/sh
# Renew Let's Encrypt SSL cert

/opt/letsencrypt/letsencrypt-auto renew --config /etc/letsencrypt/config.ini --agree-tos

if [ $? -ne 0 ]
then
        ERRORLOG=`tail /var/log/letsencrypt/letsencrypt.log`
        echo -e "The Lets Encrypt Cert has not been renewed! \n \n" $ERRORLOG | mail -s "Lets Encrypt Cert Alert" "FIX IT! :)" youremailaddress@provider.com
else
        service httpd reload
fi
exit 0
Please note that we piped the result to a very well known mail command. So you get notification if it fails to renew. Feel free to change the script the way you want it. And do not forget to comment below if you find this post useful ?


Wrap your code in
<code class="{language}"></code>tags to embed!